Chateau-President-Symphony-Designer
installation
Builder installation
Installation and cleaning Instructions Chateau/President/Symphony/Designer Series Mantel
Historic Mantels Parts
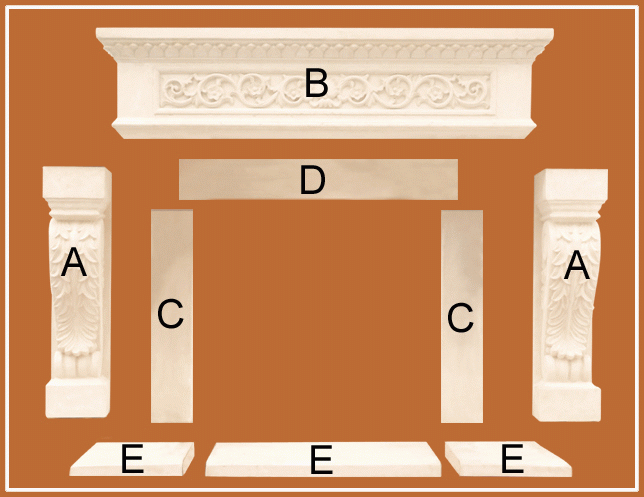
A 2 ¨C Legs
B 1 - Mantel Shelf
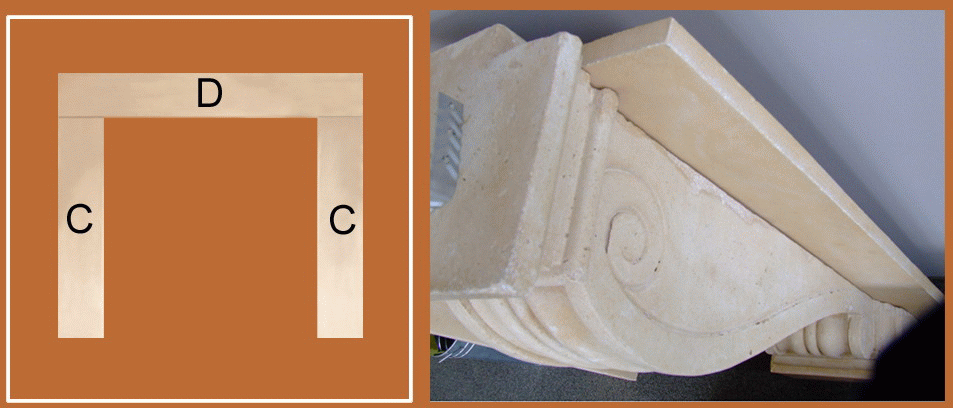
C 2 side filler panels
D 1 top filler panel
E 3 piece
hearth (for Chateau and
President Series mantels only)
Center the hearth at the firebox opening and set tight to the wall. Thehearth should be level to ensure there are no spaces between the floorand under side ofthe hearth. Once centered apply construction adhesive (we recommend PL Premium) to the under side of the hearth.


Cut the filler panels to the required size. We recommend using an small angle grinder with concrete blade. Apply construction adhesive to the back of the filler panels. Place the mantel legs to determine the correct measurements. Do not screw the legs into the wall until the filler panels have been installed.

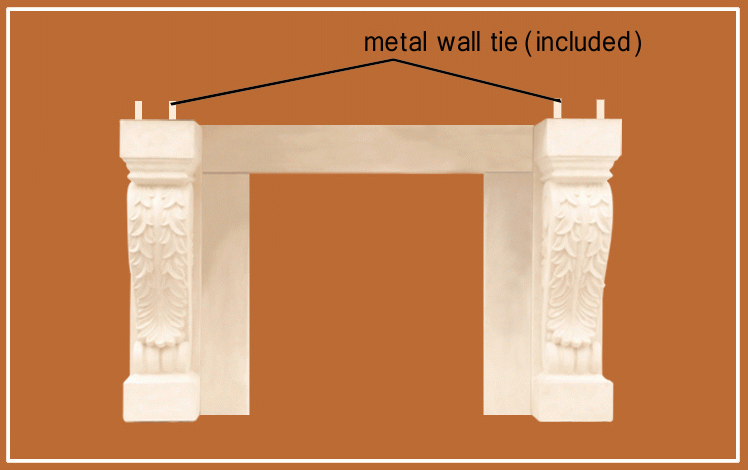
Determine and mark the position of the legs. Mark sure the legs are level and identical distance on either side of the firebox opening. Use shims to level the mantel legs if required. Apply construction adhesive to the back of the legs and screw the legs to the wall using the metal wall ties attached to the top of the legs .
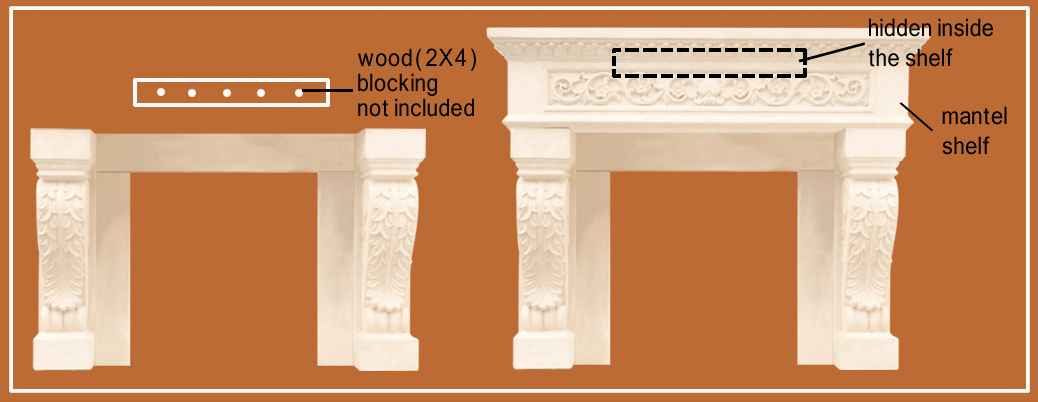
Mantel shelves are cast with a cavity in the back to accommodate wood blocking for support. Locate the wood blocking position by off setting the material thickness at the top of the shelf from a pencil line indicating the top edge of the mantel shelf when set on the mantel legs. Screw wood blocking with wood screws into the wall studs for greatest support. Apply adhesive to the back surfaces of the mantel shelf, top of leg and the top of the wood blocking to ensure continuous contact with the wall. Use bracing to secure the mantel shelf tight to the wall until the adhesive sets.
Fill any gaps around the mantel with the cement provided. NOTE the cement provided dries in less then 20 minutes. Add colored water and apply promptly. Color the water by mixing it with any dark color COLD tea.
*mix only a small amount of cement as needed as it dries in 20 min
Historic Mantels are factory treated with a clear water-based sealer and do not require additional surface treatment
Clean mantel with a damp cloth as needed. Do Not wet the mantel. Water marks may appear if the cloth is wet.